Showing posts with label charcuterie. Show all posts

Monday, 15 September 2014

How to Make Beef Jerky: 8 Steps (with Pictures) - wikiHow

How to Make Beef Jerky: 8 Steps (with Pictures) - wikiHow


 "Select a cut of meat. Choosing a lean cut like sirloin, flank steak, top round, or eye round will save time later.
  • Some jerky nowadays is also made from turkey. Turkey has a mild flavor, making it a perfect sponge for all your yummy seasoning. Plus, turkey is very lean.
  • Your jerky need not be limited to beef and turkey, however. Many types of jerky — bison, deer, elk, caribou, and salmon, among others — can and should be used."  source : WikiHow

 Remove all noticeable fat. Fat causes the jerky to spoil much faster. Slice your meat into very thin strips less than 1/20" thick (sometimes a butcher will do this for you for an extra fee if you ask). To make it easier to slice, freeze it for about 5 hours before slicing. You can cut with or against the grain; some find that strips cut against the grain are easier to chew. Trim the fat as you go along, since fat does not dry.

 Marinate the meat. Use a solution of olive oil and vinegar sea salt, or a recipe of your preference. Place in the refrigerator for 10 - 24 hours to allow the meat absorb the flavor. This step is optional; the additional moisture can make dehydration take longer and the resulting jerky may be stickier. Brown sugar is a great addition.
  • One good combination marinade is liquid smoke, soy sauce, Worcestershire sauce, Tabasco, and brown sugar.
  • Another great marinade is dark Belgian ale (yes, you read that right!), honey, soy sauce, mustard seeds, garlic, and lime.
  • Add some kick to your jerky with peppers! Habanero, jalapeno, or Anaheim peppers made a great addition (in moderation) to most jerky recipes.
  • Add some unusual flavors to your jerky by adding some pineapple juice (Hawaiian jerky); some ginger (Asian jerky); or some curry powder (Indian jerky). Don't be afraid to experiment!

    Coat the meat in the seasonings of your choice. Don't be afraid to use salt. Salt will aid in dehydrating. Note: a simple marinade of oil, vinegar, liquid smoke, and brown sugar is recommended for the following seasonings. Try dusting your marinaded jerky with a little bit of salt, pepper, cinnamon and chipotle pepper. "
 Read more:  with great clear photo guide

Monday, 4 August 2014

Jerky and spiced veg


 Marinated beef strips and vegetables ( parsnip, onions, also carrots courgettes etc sprinkled with olive oil, Himalayan salt and herbs
 Dehydrated until crispy


Thursday, 26 September 2013

Salami, chorizo & Parma style ham / mangalitza meat


Salami Recipe :

On the left is about a kilo of pork shoulder (including bones). On the right is 200g of back fat. Half an hour in the freezer will make the meat easier to handle

Remove bones, skin and any stringy connective tissue from the shoulder and slice the meat around 1cm thick
Cut each slice into batons then across into dice

Go over the pile roughly with a big chopping knife so part of the meat is more finely and irregularly cut. Skip this phase if you like your salami chunky, spend ages on it if you like it smoother
Cut the back fat into 1cm dice

Combine the chopped shoulder meat (should be around 800g) with the cubed fat (200g) and weigh accurately. The proportion for curing is at least 25g of salt for every kilogram of meat

Select your flavourings. You can go all manner of wild here but I've stayed basic. 1 clove garlic and half a teaspoon each of fennel and black pepper. Grind the ingredients with a pestle and mortar, and along with your measured salt work it all into the meat mixture with your hands

You can also try paprika, rosemary, orange peel or pretty much anything else you fancy. If you're feeling particularly French you can also add 150ml of rough red wine
Chill the stuffing mix for a couple of hours while soaking the casings

If you're lucky enough to have a mincer attachment you can use it as a stuffer ...

... or you can pick up a cheap sausage funnel and pack by hand

Twist and cut your salamis to length then tie off the ends of the casings in a knot and secure with string. Make a loop at one end

Weigh each salami and label it with ingredients, date and weight


Hang your salamis outside to dry. Chose a place where they're under some cover, in clear circulating air and protected from animals and birds. If you have an outdoor shed or garage it might do or you can rig up a simple hanging safe like this from wire mesh and a small dustbin lid. A dry white mould is acceptable on the outside of the skin but patches of fur or coloured mould should be washed off as they develop with a weak solution of vinegar in water
 
Your salamis will be ready to eat after a month of hanging. You'll know they're done when they have lost around 30% of their weight. They will be softer in texture than many cheap shop-bought salamis ...


 Parma ham recipe and info

Air-dried hams rely simply on salting and drying to produce their finished texture and taste. The basic procedure is a two-stage affair: curing, then drying. Find out how to do it yourself with this step-by-step guide from The River Cottage Cookbook.
For the cure, the whole leg is completely packed in salt and pressed under a substantial weight to accelerate the moisture loss and salt penetration.
This pressing also contributes to the dense texture of the ham. Once cured, the ham is hung to dry and mature in a cool airy place for several months.
Air-dried hams are eaten 'raw', and at their best must rank as one of the greatest delicacies you can make with a pig. In Italy every region has its special air-dried ham, of which Parma ham is the most famous.
The Alpine hams of Haute Savoie and the Serrano hams of Spain can also be delectably distinctive, demonstrating that the taste and texture of an air-dried ham varies according to the diet and variety of the pig, and the length and conditions of the curing and hanging.
In making your own dry-cured ham it is best not to think in terms of imitating European regional classics but rather enjoying whatever turns out to be distinctive about your own idiosyncratic version.
As long as you don't salt it too much or cut it too early, it is very likely to be delicious.
The secret of success is to be well organised: read the instructions below carefully before you even take your pigs to slaughter. Get your ham-making kit together well in advance and talk to your butcher about your needs.
Work out where you are going to store your ham while it cures, and where you are going to hang it. Attend to the detail and you have every chance of first-time success.
Once in a while, and sometimes for no good reason one can think of, a hanging ham will go rotten on you. It's heart-breaking when it does, but all you can do is get back in the saddle and try again.

What you need

The equipment (for each ham)

  • a wooden wine case or similar-shaped box (plastic will do but don't use a metal one) with a few small holes in the base for drainage
  • a 10-15kg weight
  • a wooden or plastic board
  • plenty of muslin
  • butcher's string
  • a darning needle
  • a sharp skewer

The ingredients

  • 1 leg of pork
  • about 5kg fine cooking salt (not sea salt)
  • 1 tbsp black peppercorns, cracked
  • 1 tbsp coriander seeds, cracked
  • white wine vinegar


Ask your butcher to cut legs for dry-curing as 'long' as possible, to maximise the size of the ham.
Italian-style prosciuttio is boned out, so that it can be sliced very finely with an automatic circular meat slicer.
You can make air-dried ham on the bone (See below), but for the beginner a boned-out ham has less risk of going bad, as you can rub plenty of salt into the cavity to help cure it from the inside as well as the outside.
                  
There are two ways to bone out a ham for dry-curing. The simplest is to slit through the skin and meat on the 'short' side of the leg (i.e. the side where most of the meat is exposed by cutting from the main carcass) right along the length of the bone.
Use the point of a very sharp knife to nick the meat away from the bone until you can lift the whole thing out. It takes patience and practice but is something an amateur can make a reasonably tidy job of.
Once you have removed the bone, take a handful of salt and rub it well into the cut surface of the meat from which the bone was taken. After salting the inside of the leg you will need to stitch it up again.
This is done by bringing back together the edges of the cut you made to access the bone, to reform the shape of the ham, and stitching it with good butcher's string.
First use a sharp skewer to make the holes for stitching, and then run the string through the holes with the darning needle.
You need a good tight blanket stitch.
You can avoid the stitching process by asking your butcher to 'tunnel-bone' the leg for you. This is a highly skilled technique which not all today's butchers are up to, but it does create a natural cavity to rub the salt into without the need for stitching.
Whether tunnel-boned or stitched, and in either case salted on the inside, your leg should now be weighed: make a note of the weight.
Pour salt in a layer about 2cm thick over the base of the wine case.
Sprinkle the cracked peppercorns and coriander seeds over the salt and place the leg in the box with the lean, meaty side down and wide skin side facing up.
Pour the rest of the salt in an even layer over the leg until every bit of it is covered by at least 2cm of salt. Cover with a piece of wood or plastic that just fits inside the wine box and covers as much as possible of the leg.
Place a large weight (a stone or a concrete block will do) weighing 1½-2 times the weight of the leg on top of the board.
Leave the box in a cool, dry larder or cellar and check regularly to ensure that no mice or rats have been burrowing into the salt to get at your ham!
The weight of the ham will determine how long it should be salted: it should be left for no fewer than 3 days per kilo and no more than 4 (the latter is 'safer' but your ham may turn out a little on the salty side).

When you have left the ham for the allotted time, remove it from the box and wash thoroughly with fresh cold water to remove excess salt. Rub the whole joint with white wine vinegar and wrap completely in a double layer of muslin, tied tightly with butcher's string.
Hang in a cool, well-ventilated place for 4-6 months to 'wind dry'. Ventilation is essential, and the more 'wind' the faster and better the cure.
                  
A draughty barn or garage would be a suitable location; I hang mine in the porch at River Cottage. Or, like my friend Victor, you could construct a rainproof frame for your hams and hang them in a tree.
Surround the frame with chicken wire to make it bird- and squirrel-proof, but not windproof.
A squeeze with the fingertips will tell you when your ham is ready: it should be very firm but not quite rock hard - still giving just a little.

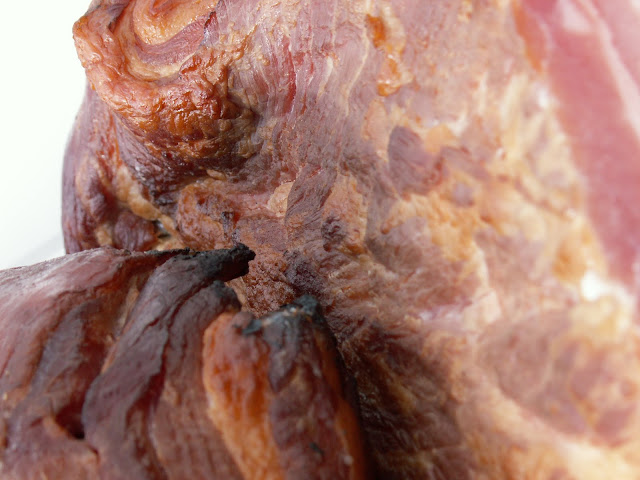
Taking down your ham after many months is a moment of high excitement. Don't be alarmed to find, on unwrapping it, that it is covered in mould. This doesn't mean it has gone rotten, and the mould is easily scrubbed off with a nail brush dipped in vinegar.
If it is rotten you will know: it will smell bad and be black in parts.
Slice the ham as finely as you can (you'll see why a circular meat slicer is such a godsend). Pour yourself a glass of fine wine and sample away. It's possible you will find hams cured in this way a little on the salty side.
                  
Having something sweet on hand to balance this often enhances the pleasure.
Fresh melon or figs are the classic accompaniments to Parma ham, but cherry tomatoes, as sweet as possible, are also excellent.
Dried figs, gently poached with a few pickling spices until tender and then left to cool , are my all-time favourite accompaniment.
This recipe is from "THE RIVER COTTAGE COOK BOOK". Available at the river cottage website


Tuesday, 5 July 2011

Homemade Corned Beef Recipe | Leite's Culinaria

Homemade Corned Beef Recipe | Leite's Culinaria


  ( great website with many more wonderful recipes)


Mar 14, 2011 by 

Homemade Corned Beef Recipe

Ingredients

metric conversion
For the pickling spice
  • 2 tablespoons black peppercorns
  • 2 tablespoons mustard seeds
  • 2 tablespoons coriander seeds
  • 2 tablespoons hot red-pepper flakes
  • 2 tablespoons allspice berries
  • 1 tablespoon ground mace
  • 2 small cinnamon sticks, crushed or broken into pieces
  • 2 to 4 bay leaves, crumbled
  • 2 tablespoons whole cloves
  • 1 tablespoon ground ginger
For the brine
  • 1 gallon water
  • 2 cups Morton’s kosher salt
  • 1/2 cup sugar
  • 1 ounce (5 teaspoons) pink salt (see Note)
  • garlic cloves, minced
  • 4 tablespoons pickling spice (above or store-bought)
  • One 5-pound well-marbled (first-cut) beef brisket

Directions

Make the pickling spice
Buy the Charcuterie cookbook
Want it? Click it.
1. Lightly toast the peppercorns, mustard seeds, and coriander seeds in a small dry skillet, then smash them with the side of a knife just to crack them.
2. Combine the cracked spices with the remaining ingredients, mixing well. Store in a tightly sealed plastic container or glass jar.
Make the brine
3. Combine the water, salt, sugar, pink salt, garlic, and 2 tablespoons of the pickling spices in a pot large enough to hold the brisket comfortably. Bring to a simmer, stirring until the salt and sugar are dissolved. Remove the pot from the heat and allow to cool to room temperature, then refrigerate the brine until it’s completely chilled.
4. Place the brisket in the brine and weight it down with a plate to keep it submerged. Refrigerate for 5 days.
5. Remove the brisket from the brine and rinse it thoroughly under cool running water. (Resting is not required here because the distribution of the brine will continue in the long, slow cooking process.)
Cook the corned beef
6. Place the brisket in a pot just large enough to hold it and add enough water to cover the meat. Add the remaining pickling spice and bring to a boil, then reduce the heat, cover, and simmer gently for about 3 hours, or until the brisket is fork-tender. There should always be enough water to cover the brisket; replenish the water if it gets too low.
7. Remove the corned beef from the cooking liquid, which can be used to moisten the meat and vegetables, if that is what you’re serving (see headnote). Slice the corned beef and serve warm, or cool, then wrap and refrigerate until you’re ready to serve, or for up to a week.
Note: Pink salt, a curing salt with nitrite, is called by different names and sold under various brand names, such as tinted cure mix or T.C.M., DQ Curing Salt, and Insta Cure #1. The nitrite in curing salts does a few special things to meat: It changes the flavor, preserves the corned beef’s red color, prevents fats from developing rancid flavors, and prevents many bacteria from growing.
Hungry for more? Chow down on these:


Get more deliciousness at Homemade Corned Beef Recipe | Leite's Culinaria 


Salt Cured tuna...... and pork fillet

The original recipe by `Playing with fire and water`


salt cured tuna
Mochama (Portugal), mojama (Spain), and mosciame (Italy) should be made from very fresh tuna (sushi quality). Cut the loin lengthwise with the grain into portions that are up to 5" wide and no more than 2" thick. On a whim, I brushed half of the portions with sweet soy (equal amounts of soy sauce and brown sugar, brought to a boil) during the first three days of drying. I found that this untraditional finish enhanced the final product.

In a deep, nonreactive dish, spread out a 1/2" thick layer of sea salt. Lay tuna portions on top, leaving a space between each. Cover tuna with 1/2" thick layer of salt. Cover and refrigerate for 2 days. 
After 2 days, remove tuna from salt and rinse well. Place tuna in a large bowl and cover with cold water. Set aside in the refrigerator for 2 days, changing the water 6 times during the soaking period.
After the tuna soaks for 2 days, remove from water and pat dry with paper towels. Thread a coated wire through one end of each portion and bend the end into a hook. Hang in the refrigerator to dry, allowing plenty of room between each portion for good air circulation. After 7 days, it is ready to use.

 Note:
 I really like the above idea and will experiment with it soon but for now, I made our own version of the recipe;
 Mixing approx. 2 tbsp kikkoman soya sauce with a drizzle of agave nectar.
 I brushed tuna stakes with the mixture, placed them in a ceramic dish, on  a layer of sea salt and freshly ground pepper and covering with some more sea salt and pepper ( black or rainbow), covered with cellophane ( can be also placed in air tight vacuum closing container /vacuum bag- will try this one next time) and kept in the fridge overnight. Great with bread, rice, as a tasty sushi ingredient and just perfect with rice and kimchi.
 I guess, using dehydrator may be a good idea too.


                                                   and after a short visit in dehydrator


                                                                   with freshly ground pepper


Also based on the very same idea

Charcuterie Pork Fillet


Sweet and salty, marinated in a splash of Kikkoman soya sauce and maple syrup 
 mixture, with  good helping of sea salt, pepper crushed garlic and herbs of your choice . After 2-3 days, dry lightly with kitchen towel (paper towel) and transfer to dehydrator for approx 2-3 hours  or place in a cool, dry place for a few days


Making Pastrami

Making Pastrami — Foodtease: Canadians in Texas

making pastrami by David in Foodtease.comhttp://foodtease.com/2010/05/making-pastrami/

Messada di bue – Italian beef cured with herbs and garlic

Messada di bue – Italian beef cured with herbs and garlic

Salt, herbs and time.
Start with a piece of beef.  The fact that the meat will be given a short cure means that you don’t have to go for a tender cut – the salt will tenderise even the toughest cuts if it’s given enough time.
Any cut that’s very lean will do, but I plumped for a flat piece of brisket this time.  The butcher cut me a 400g piece and tried to avoid as much of the fat as possible, such is the value of using a proper butcher and getting to know him or her.
Incidentally, my butcher is great – she knows I cook some slightly out of the ordinary things, and takes a genuine interest in them.  That’s a very good quality in a butcher, or any local business person, for that matter.  There should be more butchers like Binns of Saltaire.
Now for the magical part…you’ve got some beef, now you need to get some flavour into it.
Chop together a couple of handfuls of mixed, fresh herbs such as thymemarjoramparsley,rosemary or oregano.  The exact quantities and the exact mix are up to you.  Go with whatever flavours you think taste good together, jut make sure that you’ve got enough to cover the beef completely on both sides.
Chop the herbs very, very finely, and mix in two finely chopped garlic cloves, a healthy grinding ofblack pepper and about twenty-five grammes of salt.
Spread the herb mixture out on a shallow tray and roll the beef in it until the meat has picked up all the herbs and salt and it’s completely covered.
Lay the beef, flat, on top of a pair of bay leaves in a non-metallic dish and cover with sheet of plastic.  A sandwich bag slit open is perfect.
Y0u need to press the beef, so now’s the time to head for the shed/garage and get one of those small offcuts of wood that you knew would come in handy one day.  You need a piece of wood that fits the dish snuggly, so that you can lay it on top of the plastic covered meat and weigh it down with a few tins of baked beans.
Once you’ve finished with the saw and got the wood to fit the dish, put the whole lot in the fridge.
Turn the meat every day and leave it there for at least two days and up to four or five says if you want a stronger flavour or are working with a very tough cut of meat.

Serve with salad and cubes of Gorgonzola.
I’ve had some difficulty translating the name of this dish.  The recipe came from a cookery course at a big Italian restaurant in Leeds, but when I tried to get a translation of the word ‘messada’ the otherwise trusty Google Translation service scratched its head and shrugged its digital shoulders.  I asked a few of Yorkshire’s finest Italians  what they thought on Twitter and the general consensus was that they’d never heard of it before, but it might be a dialect word, perhaps from Tuscany.
The only thing everybody agreed on is that ‘bue’ means ‘beef’.
Or ‘ox’…
Any ideas on ‘messada’, though would be gratefully received.
When the beef is ready, wash away all the salt and herbs and slice the beef very, very thinly with a big, sharp blade – a long bladed knife will give better results.  This takes some practise, but the finer, the better.


Juniper, Lemon and Sea Salt Cured Salmon | Culinary Comfort

Juniper, Lemon and Sea Salt Cured Salmon | Culinary Comfort
  Source: MC Hendricks

 posted by: Chef Thomas Minchella

Wrap the Gravlox in cheesecloth.

Gravlox
1 side fresh salmon(about 1 1/2 to 2 pounds) skin on1 cup sea salt1 cup super fine sugar3 bunches of fresh dill, chopped1/4 cup whole black peppercorns1/4 cup juniper berries4 lemons, sliced thincheeseclothMix the above ingredients together except the lemons. Spread the cheesecloth over a baking dish overlapping the sides. Place the salmon on the cheesecloth skin side down and spread the dill mixture evenly over the top. Layer the lemon slices over the dill mixture and wrap with the cheesecloth. Set a small cutting board on top and then a weight. Place in the refrigerator overnight. Cure for three days turning every 12 hours.Remove all the salt mixture and wipe with a damp cloth. Keeping the skin on will aid in slicing the salmon. Start slicing from the small end first and see if you can get it so thin you can read a newspaper through it.


Dilled Mustard Sauce

1/4 cup Pommery Mustard1 teaspoon dry mustard1 tablespoon dark brown sugar1/2 teaspoon saltjuice of 1 lemon1/4 cup extra virgin olive oil2 tablespoon fresh dill, choppedIn a bowl mix together the mustards. Add the salt and brown sugar. While whisking slowly drizzle in the lemon juice and olive oil. Stir in the chopped dill.

Home Cured Bacon

Difficulty Ratings: Home Cured Bacon | BetsyLife


                                      Home Cured Bacon  Source: Betsy Life


                                                              Our own cured produce


Home Cured BaconOrder five pounds of fresh pork belly from your grocery store, the pork guy at your farmers market, or from a local butcher shop.
—Buy a box of 2-gallon zip-top bags if you don’t have a container big enough to hold the belly.
—Mix the following together in a small bowl:2 ounces (1/4 cup Morton or Diamond Crystal coarse kosher) salt2 teaspoons pink curing salt #1 (I use this DQ Cure from Butcher-Packer, $2)4 tablespoons coarsely ground black pepper4 bay leaves, crumbled1 teaspoon freshly grated nutmeg1/4 cup brown sugar or honey or maple syrup5 cloves of garlic, smashed with the flat side of a chef’s knife2 tablespoons juniper berries, lightly crushed (optional)5 to 10 sprigs fresh thyme (optional)

—Put your belly in the zip-top bag or on a sheet tray or in a plastic container.  Rub the salt and spice mixture all over the belly.  Close the bag or cover it with plastic wrap, and stick it in the refrigerator for seven days (get your hands in there and give the spices another good rubbing around midway through).—After seven days, take it out of the fridge, rinse off all the seasonings under cold water and pat it dry.—Put it on a sheet tray and put it in the oven (put it on a rack on a sheet tray if you have one) and turn the oven on to 200 degrees F. (if you want to preheat the oven, that’s fine, too). Leave it in the oven for 90 minutes (or, if you want to measure the internal temperature, until it reaches 150 degrees F.).—Let it cool and refrigerate it until you’re ready to cook it  See more
final result


Homemade Beef Jerky Made Easy

  Orginal source: My Man`s Belly

Homemade Beef Jerky RecipeIngredients
  • 1 1/2 – 2 Pounds of London Broil (or other piece of lean beef like eye of round – the cheap cuts of beef)  ( or venison)
  • 1/3 Cup Orange Juice ( try using  freshly made or even apple pulp- soft boiled)
  • 1/3 Cup Bourbon ( omitted)
  • 1/3 Cup Honey( replaced with agave syrup)
  • 3 Tablespoons Kosher Salt
  • 2 Tablespoons Chipotle Powder (or less if you don’t want that much heat)  ( omitted, see below)
  • 1 Large or 2 Small Cloves of Garlic  ( added more)
  • 1/4 Teaspoon Fresh Ground Black Pepper
( I also added some soy sauce and Worcester sauce, some cayenne pepper, onion powder)


Directions

Make a paste out of the garlic by chopping it then sprinkling a tablespoon of the kosher salt onto it.  Using the side of your knife, run the edge back and forth over the garlic and salt.Add all of the ingredients (except for the meat) into a one gallon zip top bag.Remove any excess fat from the meat (and discard it).  Add the meat to the mixture in the bag.  Having extra fat on the meat will prolong the drying time and will cause the jerky to go rancid more quickly.Remove as much air as possible and seal the bag.  Work the marinade with your hands so that it gets mixed up and coats the meat.  (Most recipes tell you to slice your meat before putting it into the marinade.  I like having more of the beef flavor in the jerky.  With this method, the marinade penetrates about 1/8″ into the meat leaving the center of the jerky with more of the beef flavor.)Refrigerate overnight.  Turn the bag over halfway through the marinating process so that both sides sit in the marinade evenly.Remove the meat from the marinade and slice, against the grain, 1/8″ – 1/4″ thick slices.Put the slices back into the marinade for two hours and refrigerate.Remove the slices from the marinade and lay them out into a single layer on the racks of your dehydrator.Set the temperature to 165 degrees Farenheit and dry for 6 – 8 hours.  You’ll need to check periodically to see how your meat is drying.  ( I use dehydrator )Once done, place the strips into a zip top bag.Your jerky should last 2 weeks at room temperature or at least a month refrigerated.* I have not tried making jerky using the oven method, but if you click on the Michael Ruhlman link you’ll find his instructions for the oven drying method


Dry cured Spanish Chorizo recipe

Dry cured Spanish Chorizo recipe 

 by Mattikaarts 

 1700g pork shoulder – final weight trimmed weight – cut in to 1/2″ dice
207g pork back fat, roughly diced (12% of pork shoulder weight)Salt – 3% (52g)Cure2 – 0.24% (4.5g)Dextrose – 0.2% (3.8g)Sugar – 0.2% (3.8g)Black Pepper – 0.6% (11.4g)Piment d Espelette – 1.8% (34g)Bactoferm TSPX – 1tbsp1/4 cup distilled waterhogs casings- 12ft of or so.  See more

Charcuterie: How-to make it at home | Yummly

Charcuterie: How-to make it at home | Yummly